

How to Replace and Install Ink Rollers: Step-by-Step Tutorial
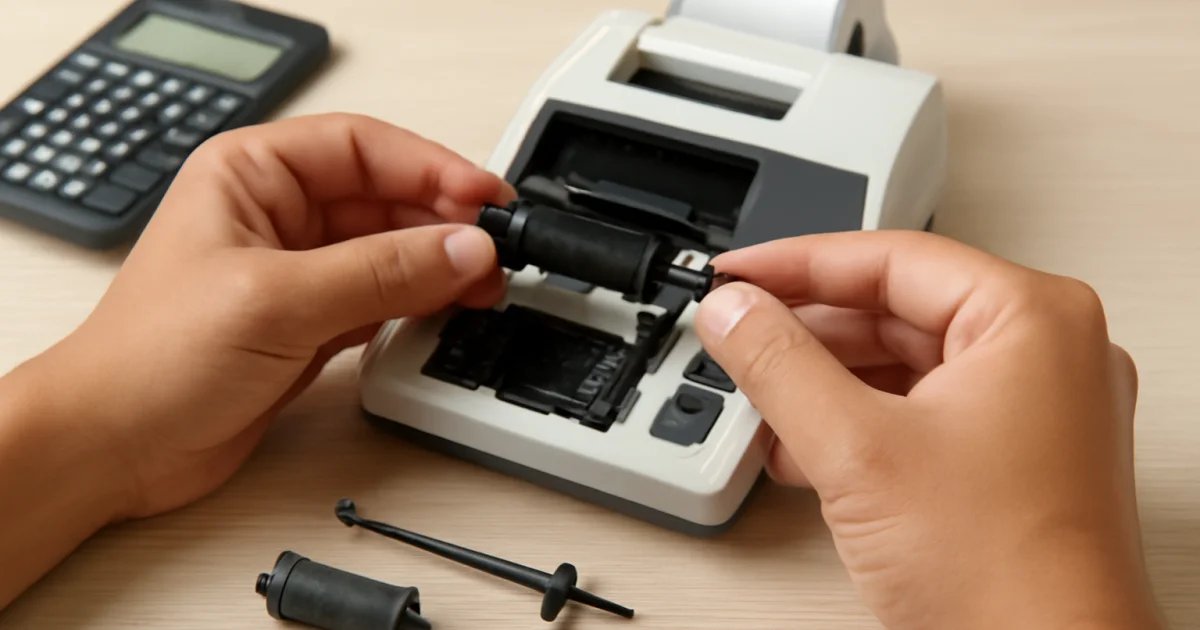
Ink rollers play a crucial role in the smooth functioning of calculators, POS systems, cash registers, and various office machines. Whether you’re an office equipment dealer, retailer, or a professional responsible for maintaining such devices, knowing how to correctly replace and install an ink roller is a valuable skill. This step-by-step tutorial will walk you through every stage of the process, ensuring your machines deliver clear, consistent print results and minimise downtime.
Understanding Ink Rollers: Function and Importance
Ink rollers are small but essential consumables that provide the ink necessary for printing characters, numbers, and symbols onto paper. They’re commonly found in:
- Calculators
- POS (Point-of-Sale) systems
- Cash registers
- Time recorders
- Labelling and pricing machines
- Industrial coding and marking systems
Over time, ink rollers dry out or become depleted, resulting in faded, incomplete, or illegible prints. Timely replacement ensures operational efficiency and extends the lifespan of your equipment. As an ink roller manufacturer serving businesses across Malaysia and globally, Omnimetric Technologies recommends proactive maintenance to keep your operations running smoothly.
When Should You Replace an Ink Roller?
Recognising the right time to replace an ink roller is key to uninterrupted workflow. Here are clear indicators:
- The printed output appears faint, streaky, or patchy
- Characters miss sections or are barely readable
- Paper is feeding correctly but no print appears
- Ink roller surface appears dry or cracked
- It has been several months since the last replacement (varies by usage)
For high-volume environments, maintaining a replacement schedule and keeping spare rollers on hand is a best practice.
Choosing the Right Ink Roller for Your Machine
Selecting a compatible ink roller is critical. Here’s how to identify the correct type:
- Machine Model: Check the user manual or the existing roller for model numbers and specifications.
- Roller Size: Measure the diameter and length if unsure. Most manufacturers supply sizing charts.
- Ink Colour: Black is most common, but some machines use purple, red, or blue.
- Roller Type: Some equipment uses cartridge-based, while others use open rollers or spools.
Consult your equipment supplier, or browse our ink roller catalogue for a wide range of options suitable for calculators, POS systems, and more.
Preparation: Tools and Safety Tips
Before you begin, gather the following:
- Compatible replacement ink roller
- Clean lint-free cloth
- Optional: Tweezers or small flat screwdriver
- Protective gloves if handling ink-sensitive parts
Safety Tip: Always power off and unplug the device before opening any compartment. Avoid contact with moving or electrical parts, and wash hands after handling old rollers.
Step-by-Step Instructions: Replacing and Installing Ink Rollers
- Switch Off and Unplug the Device
Ensure the machine is powered down and disconnected from any electrical source to prevent accidental activation or injury. - Locate the Ink Roller Compartment
Open the printer cover, calculator lid, or designated access panel. Refer to the device manual for exact location. In most calculators and POS systems, the ink roller is situated above or near the print head assembly. - Remove the Old Ink Roller
Gently grasp the ink roller by its ends. If it’s held by clips, squeeze or release them. Some models require you to lift or slide the roller out. Use tweezers if access is tight, but avoid excessive force to prevent damaging components. - Dispose of the Old Roller Responsibly
Place the used roller on a disposable cloth or paper. Avoid touching surfaces with ink residue. Check local recycling guidelines for proper disposal. - Inspect the Roller Area
Before installing the new roller, use a lint-free cloth to remove dust or ink build-up. Ensure no debris is left behind that could obstruct the new roller’s movement. - Unpack and Prepare the New Ink Roller
Remove the new roller from its packaging, avoiding direct contact with the inked surface to prevent smudges. Identify the correct orientation (some rollers are keyed or colour-coded). - Install the New Ink Roller
Align the roller’s ends with the slots or holders in the compartment. Insert gently until it snaps or clicks into place. Do not force the roller; it should fit smoothly. - Close the Device and Test
Secure all covers or panels before plugging the device back in. Power on the machine and run a test print or operation. Confirm that print quality is restored, with clear and consistent output.
Expanding Your Knowledge: Best Practices for Every Step
While the basic steps are straightforward, following additional best practices ensures both efficiency and safety. Here are some expanded considerations for each stage of the process:
1. Preparation and Workspace Setup
- Work in a clean, well-lit area to avoid misplacing small parts and to clearly see the roller’s orientation.
- Lay down a disposable mat or newspaper to catch any ink spills or residue during removal and replacement.
- Prepare a small tray or container for holding screws or panels, especially if working on complex machines.
2. Handling Old Ink Rollers
- Old ink rollers may still contain residual ink, which can stain hands or surfaces. Always handle them by the ends and avoid touching the inked area.
- Consider wearing nitrile or latex gloves if you are sensitive to ink or wish to prevent staining.
- If you encounter resistance when removing the roller, double-check for hidden latches or fasteners in the compartment.
3. Inspecting the Print Head and Compartment
- Inspect the print head for any visible buildup or ink deposits. Gently wipe the area with a lint-free cloth; do not use water or solvents unless specified by the manufacturer.
- If dust or debris is present, use a can of compressed air to blow it out before installing the new roller.
4. Installing the New Roller Correctly
- Check both ends of the roller for any orientation marks or keyed shapes that indicate correct placement.
- Do not force the roller into the holder. If it does not seat easily, remove and re-check alignment.
- For cartridge-based rollers, listen for a click or snap to confirm correct installation.
5. Testing and Calibration
- After installation, always perform a test print or run a diagnostic program if available. This confirms both print quality and that the roller is moving freely.
- Observe the first few prints; if lines are faint or misaligned, double-check the roller seating and clean the print head again.
Troubleshooting Common Issues After Replacement
Occasionally, issues may arise after installing a new ink roller. Here’s how to address common problems:
- Print Still Faint or Missing: Check that the roller is fully seated and correctly oriented. Ensure the roller is not defective or dried out (rare with new rollers from reputable suppliers).
- Roller Won’t Fit: Double-check compatibility. Compare the new roller with the old for dimensions and fitting details. If unsure, consult the supplier’s catalogue or customer support.
- Streaks or Smears: Clean the print head and adjacent areas before reinstallation. Always handle the inked surface minimally.
- Noisy Operation: Confirm that the roller is not rubbing against housing or gears. Reinstall if necessary, ensuring no obstructions.
If persistent issues occur, consult your equipment manual or contact a professional service provider.
Practical Examples: Replacing Ink Rollers in Different Machines
Calculator Ink Roller Replacement
For most desktop calculators with paper printing, open the top lid, remove the paper roll, and access the roller next to the print head. Use gentle pressure to extract the old roller and install the new one as described.
Scenario: A retail cashier notices calculator printouts becoming faint. Following the guide, they safely remove the cover, take out the old roller (noting its orientation), and install a new compatible roller. After running a test print, print quality is restored, allowing for accurate receipts and records.
POS System or Cash Register Roller Replacement
Open the printer compartment, typically located under a hinged cover. Remove the spent spool ribbon if present, then gently replace the ink roller. This process is similar for many barcode and receipt printers using impact printing technology.
Scenario: In a supermarket, a manager notices receipts have ink gaps. After following the step-by-step removal and installation, the new roller restores printing clarity, helping avoid customer service delays and ensuring transaction records remain legible.
Industrial Coding and Marking Machines
For industrial applications such as product labelling, the process may involve additional steps or safety precautions. Consult the manufacturer’s manual for model-specific instructions, as rollers may be paired with thermal transfer ribbons or MICR ribbons for specialised printing.
Scenario: In a warehouse, a technician must replace ink rollers on a coding line. They follow enhanced safety protocols, use proper personal protective equipment, and carefully clean the roller path due to heavy ink use. After installation, test labels print sharply, reducing product mislabelling errors.
For more detailed examples and professional tips on maintaining print quality, you can read our article How Ink Rollers Affect Print Quality in Industrial Coding and Marking Systems.
Common Mistakes When Replacing Ink Rollers (and How to Avoid Them)
- Using Incorrect Roller Type: Always double-check your device’s specifications. A mismatched roller can fail to fit or deliver poor print quality.
- Forgetting to Clean the Compartment: Debris and old ink can cause smears or jams. Always clean the area before inserting a new roller.
- Touching the Inked Surface: Oils from your fingers can interfere with ink transfer. Handle rollers by the ends or use gloves.
- Skipping Test Prints: Always perform a test after installation to catch issues early.
- Forgetting to Power Off the Device: Always unplug before opening compartments to prevent electric shock or accidental activation.
Checklist: Successful Ink Roller Replacement
- Obtain the correct replacement roller
- Gather tools and protective gear
- Power off and unplug the machine
- Remove old roller carefully
- Clean the compartment and print head
- Install new roller with correct orientation
- Secure all covers/panels
- Perform a test print
- Dispose of old roller responsibly
Maintaining Print Quality: Pro Tips for Getting the Most from Your Ink Rollers
- Store Spare Rollers Properly: Keep them in their original packaging, away from direct sunlight, heat, and humidity to extend shelf life.
- Avoid Touching Ink Surfaces: Oils from fingers can affect ink transfer and print consistency.
- Regular Cleaning: Periodically clean the roller compartment to remove dust and debris.
- Use Quality Consumables: Choose rollers from a trusted ink roller manufacturer to ensure reliable performance and compatibility.
- Establish a Maintenance Log: Record the date of each replacement to monitor usage patterns and anticipate future needs.
- Train Staff: Provide brief training to employees or users responsible for replacing ink rollers, especially in high-traffic or multi-user environments.
- Work with Reliable Suppliers: Source your rollers from vendors who offer technical support, documentation, and a wide selection for various machine models.
For businesses with high-volume printing needs, partnering with an experienced supplier like Omnimetric Technologies ensures you receive high-quality consumables for any device, including options for thermal transfer ribbons, lift-off tapes, and dot matrix printer ribbons.
Frequently Asked Questions
How do I know which ink roller fits my calculator or POS machine?
Check your device’s user manual or the label on the old ink roller for model numbers and specifications. Many ink roller manufacturers provide compatibility charts. If you’re unsure, measure the roller and consult your supplier or refer to the product catalogue for guidance.
What is the difference between an ink roller and a spool ribbon?
An ink roller is a small, cylindrical consumable that transfers ink directly to print heads, commonly used in calculators and POS systems. A spool ribbon is a flat, ink-coated strip wound onto spools, used in typewriters, dot matrix printers, and some cash registers. Both provide ink for printing, but they differ in form, application, and installation method.
How often should ink rollers be replaced?
The replacement frequency depends on usage. For high-volume environments, consider replacing ink rollers every few months or when print quality declines. For lower-use devices, replacing once or twice a year is often sufficient. Always keep spare rollers available to minimise downtime.
Can I use a generic ink roller instead of the branded one?
Yes, as long as the generic ink roller is compatible with your device’s specifications. Ensure that the size, ink colour, and fitting match your equipment. Reputable ink roller manufacturers produce high-quality, compatible alternatives to OEM parts.
What should I do if the new ink roller does not print clearly?
First, ensure the roller is installed correctly and fits snugly in the holder. Recheck orientation and seating. If print is still faint or incomplete, clean the print head and surrounding area before reinserting the roller. If the issue persists, the roller may be defective—contact your supplier for a replacement.
Order High-Quality Ink Rollers from Omnimetric Technologies
Ensure your calculators, POS systems, and office equipment always deliver crisp, reliable prints with premium ink rollers from Omnimetric Technologies. As an experienced ink roller manufacturer, we supply compatible consumables for a wide range of machines—ideal for distributors, retailers, and OEM brands.
- Bulk order solutions and OEM/private label options
- Extensive compatibility and expert support
- ISO-certified manufacturing and strict quality control
Contact us today to discuss your requirements and keep your business running smoothly.